Showing posts with label Sweet Treat. Show all posts

Tuesday, April 1, 2008

Apple & Goat Cheese Clafoutis


Alot of the desserts you see on this blog are born of desperation. I am no baker, but it's amazing what I can whip up when the urge overtakes me. Like today, I literally have no junk in the house in a last ditch effort to shave off a few lbs for spring. However, my sweet tooth begs to differ and thus we have:

Apple and Goat Cheese Clafoutis
Courtesy Richmond Chef, Dale Reitzer
Serves 6

3 Gala apples (peeled, cored, and sliced thinly)- I had granny smith
2 Eggs
5/8 c. Sugar plus additional for sprinkling
3/8 c. Butter (soft, unsalted)
1/2 c. Goat cheese (soft)
3/8 c. Flour
Salt

Heat oven to 400 degrees.

Mix sugar with egg, butter and cheese. Sift dry ingredients together, fold in with rest of ingredients.

Divide evenly into buttered and sugared non-stick pans or rings. You may also use a 9 inch springform pan(which is what I used) or cake pans lined with parchment paper.

Overlap slices of apple over the batter and sprinkle with sugar. You will use about 1/2 of an apple per clafoutis.

Cook for about 20 to 25 minutes for individual rings (35-40 minutes for the springform pan) until brown on top. Serve with ice cream or whipped cream.

Tuesday, March 25, 2008

Best Cocoa Powder Brownies

I really can not express to you how delicious these brownies are!
Sometimes when I want a "Quick Fix", I will make 1/2 this recipe in the bottom of a loaf pan. I also use my *Vanilla Sugar for the sugar in this recipe. I have found that using regular and not dutch-process cocoa works best in this recipe. And, like it makes a difference, I sub in some Smart Balance for the butter ;) Enjoy!


Best Cocoa Brownies
Artisan by Alice Medrich\ November 2003

Cocoa brownies have the softest center and chewiest candylike top "crust" of all because all of the fat in the recipe (except for a small amount of cocoa butter in the cocoa) is butter, and all of the sugar is granulated sugar rather than the finely milled sugar used in chocolate. Use the best cocoa you know for these fabulous brownies.

Makes 16 large or 25 smaller brownies.


10 tablespoons (1 1/4 sticks) unsalted butter
1 1/4 cups sugar
3/4 cup plus 2 tablespoons unsweetened cocoa powder (natural or Dutch-process)
1/4 teaspoon salt
1/2 teaspoon pure vanilla extract
2 cold large eggs
1/2 cup all-purpose flour
2/3 cup walnut or pecan pieces (optional)

Special equipment: An 8-inch square baking pan

Position a rack in the lower third of the oven and preheat the oven to 325°F. Line the bottom and sides of the baking pan with parchment paper or foil, leaving an overhang on two opposite sides.

Combine the butter, sugar, cocoa, and salt in a medium heatproof bowl and set the bowl in a wide skillet of barely simmering water.Stir from time to time until the butter is melted and the mixture is smooth and hot enough that you want to remove your finger fairly quickly after dipping it in to test. Remove the bowl from the skillet and set aside briefly until the mixture is only warm, not hot.

Stir in the vanilla with a wooden spoon.Add the eggs one at a time, stirring vigorously after each one. When the batter looks thick, shiny, and well blended, add the flour and stir until you cannot see it any longer, then beat vigorously for 40 strokes with the wooden spoon or a rubber spatula. Stir in the nuts, if using. Spread evenly in the lined pan.
Bake until a toothpick plunged into the center emerges slightly moist with batter, 20 to 25 minutes. Let cool completely on a rack.

Lift up the ends of the parchment or foil liner, and transfer the brownies to a cutting board.Cut into 16 or 25 squares.

Chocolate note: Any unsweetened natural or Dutch-process cocoa powder works well here.Natural cocoa produces brownies with more flavor complexity and lots of tart, fruity notes. I think it's more exciting. Dutch-process cocoa results in a darker brownie with a mellower, old-fashioned chocolate pudding flavor, pleasantly reminiscent of childhood.

*Vanilla Sugar, for me, is made every year during the month of December. Any vanilla bean pods I have scraped for Christmas baking go into a special canister into which I pour white sugar. Throughout the year, I replenish the sugar and the beans continue to flavor it. They start to lose their potency after a while, so I replace every December. Thanks to Ina Garten for this great idea!

Thursday, February 21, 2008

Dictatorial Tastebuds?

Anyone else bossed around by their tastebuds? I know I am! Here's today's latest craving order-- chocolaty oatmeal cookies. Who am I to say no to that? ;)

Chocolate Oatmeal Cookies
*adapted from an allrecipes recipe by Cheryl

INGREDIENTS:
1/2 c. AP flour
1/2 c. whole wheat flour
3 tablespoons unsweetened
cocoa powder
1 teaspoon baking powder
1/2 teaspoon baking soda
1/2 teaspoon salt
1/2 teaspoon ground cinnamon
1/2 cup margarine(I used smart balance)
1/2 cup brown sugar
1/2 cup white sugar
1 egg
1 teaspoon vanilla extract
1 1/4 cups rolled oats
1/2 cup semisweet chocolate
chips(I omitted)

DIRECTIONS:
1. Preheat oven to 350 degrees F (175 degrees C). Grease cookie sheets. Stir together the flour, cocoa, baking powder, baking soda, salt and cinnamon; set aside.
2. In a large bowl, cream together the margarine, brown sugar and white sugar. Beat in the egg and vanilla. Stir in the dry ingredients using a wooden spoon. Mix in the oats and chocolate chips. Drop by tablespoonfuls onto cookie sheets, leaving 2 inches between cookies.
3. Bake for 8 to 10 minutes in the preheated oven, or until lightly browned. Allow cookies to cool on baking sheet for 5 minutes before removing to a wire rack to cool completely.

Monday, December 3, 2007

It's that time of year again..........

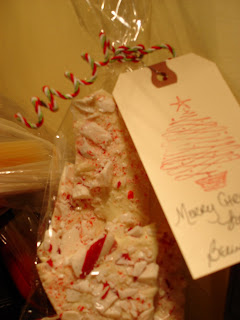
.........for me to lose my mind and decide to bake for friends and family. After a week of feverish slaving in the kitchen, it looks like Willy Wonka's candy factory blew up in my house. Each nite before bed, my husband and I peel off socks covered in caramel, peppermint and peanut brittle bits. And today I am free! We mailed the last 4 boxes of goodies to family and I am at last at peace.

I really don't know what drives me to such heights of foolishness. But, I guess until I come to my senses, family & friends are able to enjoy the home baked insanity that comes out of my kitchen.

I simplified my packaging this year with assorted ribbon from Michael's, shipping tags bought from Office Depot (hand stamped and written upon) and cellophane bags to contain the goodies. The cello bags were inspired by Ina Garten who used them during a holiday baking episode of Barefoot Contessa. I ordered them from Cello bags- http://cellobags.com/. Cheap, sturdy and convenient, they also provide a modest portion size. And to top it off, they are also an attractive vehicle through which to showcase your goodies. When thinking about the mass quantities of treats everyone would consume throughout the holiday season and how I'm trying to watch my own waistline in anticipation of a trip in March-- the cello bags were the perfect solution so that everyone could have a taste of each, but the chances of overindulging would be next to none.

Here's one of my standby, favorite Christmastime recipes-- Peanut Brittle, courtesy of Gale Gand.


Cinnamon Peanut Brittle
Recipe courtesy Gale Gand

1/2 cup water
2 cups sugar
1/4 teaspoon cream of tartar
1 cup light corn syrup
2 teaspoons ground cinnamon
2 tablespoons unsalted butter
2 cups roasted salted peanuts
1 teaspoon baking soda

Combine the water, sugar, cream of tartar and corn syrup in a medium-size heavy saucepan fitted with a candy thermometer. Bring to a boil over medium heat. After it boils, stir the mixture occasionally. Boil the mixture until it reaches 340 degrees F. The color should be deep golden brown. Remove from the heat and, working quickly, stir in the cinnamon with a wooden spoon. Stir in the butter until melted, then the peanuts and baking soda.

Pour the mixture onto the oiled cookie sheet with sides and spread it out a bit with the back of a wooden spoon, to about 1/4-inch thickness (it may not fill the whole pan). Let harden, uncovered, in a cool place, 30 to 45 minutes. (To wash the saucepan, soak it overnight.)
Using your hands, and wearing cotton or plastic gloves if desired to keep off any fingerprints, break the brittle into pieces. Store in an airtight container.

Tuesday, November 20, 2007

Caramel Apple Cheesecake Bars with Streusel Topping


Update 12/2/07-- here's the pic, really nothing much to look at. But after you allow this dessert to set up in the refridgerator, you will not be able to stop eating it! So, don't say I didn't warn you! :)
__________________________________________________________
These are in the oven baking right now in anticipation of Thursday.
We're having anti-Thanksgiving. Oh, we're thankful all right. Thankful our friends are whipping up a fabulous Italian feast for us!

This recipe is going to be our contribution to the party and a slight nod to the holiday at an otherwise nontraditional dinner. It sounded so decadent, I just had to splurge! I hope it's as good as it sounds! I will report back and have pics by next week (sorry, I know I've been a slacker lately!) If it's by Paula Deen and has 3 sticks of butter and two packages of cream cheese, you KNOW it has to be good! Happy eating, y'all!

Recipe courtesy Paula Deen
2 cups all-purpose flour
1/2 cup firmly packed brown sugar
1 cup (2 sticks) butter, softened
2 (8-ounce) packages cream cheese, softened
1/2 cup sugar, plus 2 tablespoons, divided
2 large eggs
1 teaspoon vanilla extract
3 Granny Smith apples, peeled, cored and finely chopped
1/2 teaspoon ground cinnamon
1/4 teaspoon ground nutmeg
Streusel topping, recipe follows
1/2 cup caramel topping

Preheat oven to 350 degrees F.

In a medium bowl, combine flour and brown sugar. Cut in butter with a pastry blender until mixture is crumbly. Press evenly into a 13 by 9 by 2-inch baking pan lined with heavy-duty aluminum foil. Bake 15 minutes or until lightly browned.

In a large bowl, beat cream cheese with 1/2 cup sugar in an electric mixer at medium speed until smooth. Then add eggs, 1 at a time, and vanilla. Stir to combine. Pour over warm crust.

In a small bowl, stir together chopped apples, remaining 2 tablespoons sugar, cinnamon, and nutmeg. Spoon evenly over cream cheese mixture. Sprinkle evenly with Streusel topping. Bake 30 minutes, or until filling is set. Drizzle with caramel topping.

Streusel Topping:(I actually mixed this up first),
1 cup firmly packed brown sugar
1 cup all-purpose flour
1/2 cup quick cooking oats
1/2 cup (1 stick) butter, softened
In a small bowl, combine all ingredients.
Yield: approximately 3 cups

Bella's Pumpkin Ribbon Bread

This is a spin off of a Cooking Light recipe just in time for the holidays!

Filling:
8 oz reduced fat cream cheese, softened
1/4 c. sugar
1 tbsp flour
2 egg whites

Bread:
1 cup pumpkin
1/2 cup unsweetened applesauce
1 egg
2 egg whites
1 tbsp canola oil
1 2/3 c flour
1 1/4 c sugar
1 tspn baking soda
2 tspn pumpkin pie spice
Dash allspice
Dash cloves

Preheat oven to 350 degrees

For filling, combine first four ingredients; set aside.

In a large bowl, beat pumpkin, applesauce, egg, egg whites and oil.
Combine flour, sugar, baking soda & spices in another bowl.
Add gradually while beating to pumpkin mixture.

Divide 1/2 of batter between 2 loaf pans coated w/cooking spray.
Spread each w/1/2 the filling.
Top each w/remaining 1/2 of batter (1/4 on each).
Bake 40-50 minutes. Cool for 10 minutes before removing from pans to wire racks to cool completely.

Monday, September 10, 2007

Ooo la! la! Creme Brulee


Somehow, recently I have found myself amidst a new group of folks that love food probably as much as I do! We foodies always manage to find each other!

So, it's my turn to host "Cooking Nite" at my house. My style/ethnic choice will be, French. I've already picked up the Edith Piaf (since my tapes from the 80's are well-worn and long lost in my attic), a little burgundy as well as chicken and potatos for the roasting. So far, one other person is bringing a brie fondue- how good does that sound? What happened to my new, nutritious, leafy green, fibrous filled diet you may be asking yourself? In my defense, cooking nite was planned long before my southern saddlebag enhancing expedition ;) LOL! Ok, on to the creme brulee.....

Crème brûlée (French for "burnt cream") is a dessert consisting of a rich custard base topped with a layer of hard caramel, created by burning sugar under a grill or other intense heat source. It is usually served cold in individual ramekins. The custard base is normally flavoured with just vanilla, but it can be flavoured in a number of ways: with chocolate, a liqueur, fruit, etc.
I have a very simple recipe under my belt that I've used for so long, I have no idea where it came from. All I know is that it works, and that's all I need to know! If you've never made it before, you will be amazed at how insanely simple this rich, decadent and impressive dessert is.

My recipe (some would call this a stirred method):
8 egg yolks
1/3 cup sugar
2 cups cream
1 tspn vanilla
Preheat oven to 300 degrees

Stir egg yolks and sugar together until sugar is dissolved and mixture is light yellow. Add cream and vanilla, stir until combined.


Pour through strainer (I use paper towels placed in a hand seive) over pitcher/bowl to remove bubbles.


Place towel in bottom of large baking dish/roasting pan. Pour cream mixture into 4-5 ramekins (depending on size) and place in baking dish on towel.


Place dish holding ramekins onto oven shelf. Pour hot water in to baking dish (I turn up a corner of the towel and pour the hot water under the towel so I don't splash the creme brulees) halfway up the ramekins. Bake for 40-50 minutes, depending on size of ramekins. Take out oven and let cool in water bath.


Chill thoroughly for at least 2 hours, up to 2 days.

If you don't have a hand torch, you can use your broiler-- just keep an eye on it! :)

I use turbinadao sugar for the caramelized tops, but I also like demerara(they are practically the same thing) when I can get my hands on it!


Bon Apetit!
_____________________


Addendum:
I was going to post a finished product pic, but alas, this is all I have to offer. I blinked and it was gone! LOL!

Monday, August 27, 2007

Caramel Cake

I find it more than a little ironic as well as amusing that I'm starting my food blogging journey with a baking entry. Let me state for the record that I am not a baker. I am merely an enthusiastic consumer of baked goods. But, our family friend at some point told me about her mother (who has since passed) making her a caramel cake for every birthday growing up with such wistfulness and longing, I just had to make it for her this year.

http://www.debbiesoulfulsweets.com/castIron.html
"Did you know that this sweet favorite of the American South actually has European roots? The American Caramel cake can be traced back to the France. The earliest American caramel cakes were iced, but not multi-layered like the typical ones we have today. Southern bakers immediately took to this French import, using their handy cast-iron pans to slow cook the caramel icing."

While I did not use cast iron for my recipe, I certainly used every nook and cranny of my stove. I would suggest using a tad bigger pots than they dictate in this recipe b/c boiling over is inevitable. At a certain point the glaze and frosting do "simmer down" - but not before they destroyed my smooth top range!


In the beginning stages, where there is a danger of overflow.

Final product at 230 degrees.

I would also suggest putting a layer of aluminum foil on the rack under your cakes as spill over is inevitable there as well. My third suggestion, when assembling layers-- first slice the top off the cake to make it even, then put rough cut side down so you can easily apply the glaze.


I also used cardboard cake rounds and a wooden cutting board to flip flop the delicate layers over without significant breakage. My last suggestion-- save icing the sides for last. I iced each layer a little bit, but by the time I got to the top-- it was all runing toward the bottom. I'm also going to try dipping my frosting spatula in hot water and smoothing the icing for an eye pleasing end product.


Final product!


Hopefully you will benefit from my hard won wisdom! But, any way you put it together, this cake is slap your grandma good!

http://www.saveur.com/food/classic-recipes/caramel-cake--49864.html
Caramel Cake

MAKES ONE 8" CAKE
Let the cake sit for two hours or so after icing it so that the frosting firms.

FOR THE CAKE:
12 oz. unsalted butter, softened
3 cups sugar
5 eggs
3 1⁄2 cups self-rising flour
1 1⁄2 cups buttermilk
1 tsp. baking soda
2 tbsp. fresh lemon juice
2 tsp. vanilla extract

FOR THE GLAZE AND FROSTING:
1 tbsp. light corn syrup
5 cups sugar
12 oz. unsalted butter
2 1⁄2 cups buttermilk
3 tsp. vanilla extract
2 1⁄2 tsp. baking soda
1 cup vegetable shortening

1. For the cake: Preheat oven to 350°. Beat butter and sugar together in a large bowl with an electric mixer until light and fluffy. Beat in 1 egg at a time, then beat in flour. Combine buttermilk and baking soda and beat into flour mixture. Add lemon juice and vanilla and beat well. Divide batter evenly among three greased and floured 8" round cake pans and bake until centers of cakes spring back when lightly pressed, 30–35 minutes. Let cakes cool in their pans.

2. For the glaze and frosting: Boil corn syrup, 1 cup of the sugar, 8 tbsp. of the butter, 1/2 cup of the buttermilk, 1 tsp. of the vanilla, and 1/2 tsp. of the baking soda together in a 3-quart saucepan over medium heat for 5 minutes, stirring constantly. Remove glaze from heat. Boil shortening and remaining sugar, butter, buttermilk, vanilla, and baking soda together in a 4-quart saucepan over medium-high heat, stirring constantly, until temperature reaches 230° on a candy thermometer, 25–30 minutes. Remove frosting from heat, let cool for 5 minutes, then beat with a wooden spoon until it loses its shine, 5–7 minutes. Keep frosting warm over a pot of hot water.

3. Remove cake layers from pans. Put 1 layer on a cake plate. Brush one-third of the glaze over top and sides, let rest for 2 minutes, then ice top and sides with one-third of the frosting. Set another layer on top and repeat glazing, icing, and layering process, then repeat process again with remaining layer.
First published in Saveur, July 2004